Italian Block – 2019 catch up

italianii

This goes back to May 2019 at the Sculpture Workshops. I would normally blog when the piece is finished, but things are on hold at present.

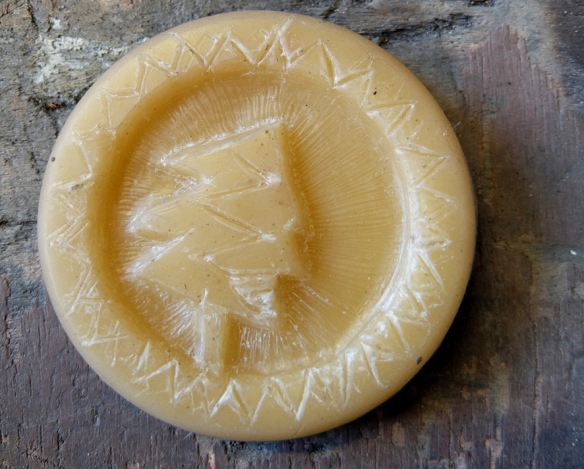
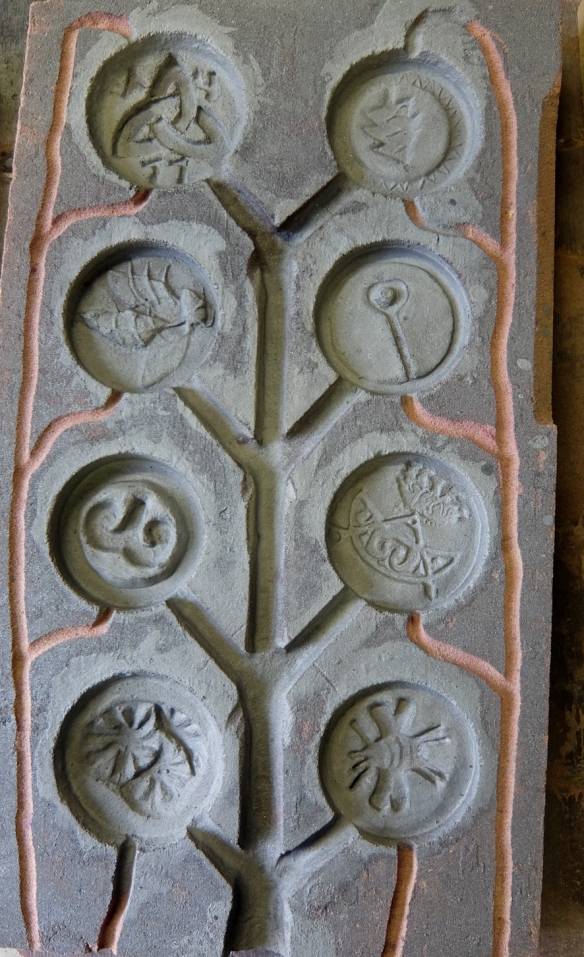
I discovered Italian block (thanks Eden) and made the beeswax model (above) for the main part of a commissioned piece remembering the heroes at Dunkirk and La Panne. The design is based on a torpedoed submarine in the Imperial War Museum in London.

subvii

dunkirksketch

I made a clay model and then took a beeswax cast from the clay. The top photo is the wax cast which has been sprued (adding runners for the metal, risers for escaping air and a funnel for pouring in the metal)

The italian block is made by making a flask of chicken wire around the wax, which is stood in pouring position in the flask.

italianiii

This is draped in hessian soaked in plaster to form a plaster flask surrounding the wax,

italiani

The flask is then filled with the plaster mixture to create a solid block around the wax and dried.

italian

The block mould is then heated slowly in a kiln overnight to melt out the wax and fire the plaster mix.

italianv

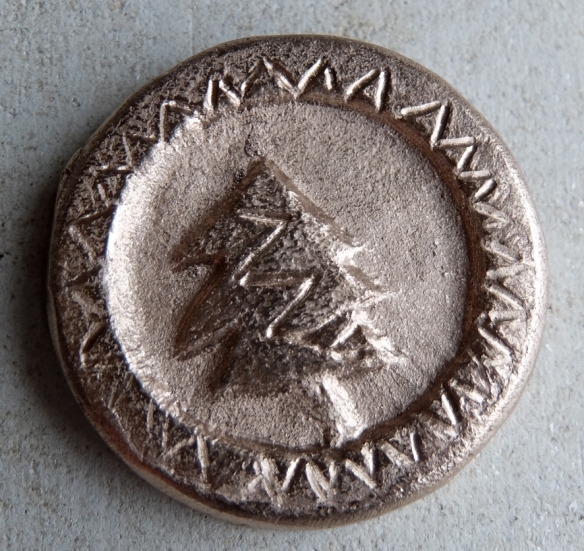
The mould is ready to be poured whilst still hot, so that it doesn’t fracture with the shock of the molten metal. This piece was poured at the end of May.

This traditional method can be used for bronze, silver and lower melt metals, but not for iron.

The Sculpture Workshop is reviewing its safety procedures and stopped all Italian block firing in summer 2019, pending the outcome of this review. Plans are in hand to remodel the metal workshops and I hope that when this happens I can explore Italian block further. I really like the method as offering great scope for design whilst being pretty sustainable and low tech.


Bronze lintel

bronzelintel

I was also making a bronze lintel. I had to take a silicon mould for the iron lintel so it was an opportunity to make one in bronze as well.

bzlintelmouldThe process was much the same, but it needed to be made in two pieces because of the limit on the crucible size in the foundry. The mould was taken from the original wax and then a clever ruse with carpeting provided for the thickness of the metal. The photo shows taking the mould from the wax which has just been used for the iron lintel mould.

Eden (op cit) undertook the pour at SSW and welded the two parts together. I came in to fettle, chase and sand blast it. It is now at home in my studio awaiting final texturing and patina.

iron lintel – the story continues

I spent several days fettling and chasing the iron lintel and cutting off bits that weren’t required. Eden (Senior Tech SSW) assisted with this process – giving advice and moving the piece around for me. He also finalised an ingenious scheme for affixing the piece at its final location.

lintelfettle

The lintel just fitted into my van and with further ingenious thinking from Eden it was stowed in a manner that I would be able to get it out by myself (or at least with one other)

I took it over to Stoer and we unloaded it. Unfortunately the weather was changing so the noble lintel moving team called off moving it to the broch that day, but they got together later to carry it in. My heart-felt thanks to them.

lintelStoer

We now await a decision on the final location so the lintel can be installed at the broch site where it belongs,

iron lintel casting

lintelfurnace

The day dawned bright and by lunchtime the mould was finally finished; Eden had mended the furnace and the ‘bull ladle’ was also fixed; the fork lift was in place to take the weight of the ladle; Michael had cracked the scrap iron (thanks Michael) and weighed the bags of coke and iron. Eden must have laid the bed of coke in the furnace when I was working on the mould indoors; the air blowers and gas tanks were in place. It was decided by the tech team to go ahead with the pour.

The furnace was lit and the air blower turned on to force the temperature up to melting point; the gas blower was turned on to the ‘bull ladle’ to heat it up ready to receive the molten iron when the furnace was tapped.

The photo above shows Michael adding a charge of coke and scrap iron to the top of the furnace. As the iron scrap heats it becomes molten and drops to the bottom of the furnace. When enough iron for the pour (over 65kg) is molten at the bottom of the furnace the bung is broken so the iron can run into the ‘ladle/crucible’.

lintelbullladle

The weight of the iron is taken by the fork lift and Michael and George manoeuvred the bull ladle into position and tipped it to pour the molten iron into the mould. There was a delay when the fork lift wouldn’t start and an alternative lifting device was tried before reverting to the fork lift.

lintelpour


Towards the end of the pour the bull ladle got caught in some way and the pour was aborted. The mould was showing metal through the air vents, so the general view was that the pour could be complete. The team have reviewed the equipment and made safety alterations since.

The metal needed to cool before I could peek inside, so I left it for the weekend. On Monday I removed the mould pieces to reveal an iron lintel, yeah


lintelcastThanks to Scottish Sculpture Workshop tech team and George Beasley.

Iron lintel – mould making continues

lintelmouldwax

The silicon mould and plaster mother mould that I took on the headland at Clachtoll made it safely to the Scottish Sculpture Workshop for the next stages.

Firstly I re-constructed the plaster mould so that I had one complete cradle for the silicon. Then I pinned the silicon into the plaster support mould and coated the inside of the mould with wax. I stippled the first layer on to capture the detail and and subsequent layers were brushed on to build up a firm mould a centimetre or so thick (thicker at the top edge) I then built the wax up as far as possible to remove undercuts on the inside.

lintelmouldi

I removed the wax wax from the silicon ready to start taking the resin-bonded sand mould.

I built a temporary box and used petrobond sand to build up the base to the wax. I did not do a good job on this, so had to make extra mould pieces at the penultimate stage (note to self to do better next time).

The resin-bonded sanded is mixed and rammed into the box around the wax, taking care to avoid undercutting.

lintelmouldii

lintelmouldiv

When the top part of the bonded sand mould was complete the whole box was turned and the ‘rescue pieces’ added. The base of the mould could then be made.

lintelmouldv

This makes a particularly uninspiring photo (above), but it over took a week to get there.

lintelwash

The mould came apart as planned and was built up into the base and the top parts. I cleaned the joins: Michael (SSW’s assistant technician) helped with the core wash; I found the bars to hold it closed and Eden (SSW technician) working with George Beasley drilled the pour holes and air vents; the piece was moved outside; the cracks were glued; the pour cups glued on; the clamp bars put on and it was ready to pour.

Unfortunately I only have video footage of this stage so I can’t show it. The next post will show the pour.

Clachtoll broch proposed iron piece

Finally I got a weather window to start work on the second piece of my residency.

linteltent1We got a tent erected near to the broch, in the lee of the stones from the rockfall in the broch that the restoration project removed in season one. It was surprisingly easy to heave the stone lintel into the tent on Day 1 and surprisingly uncomfortable working in and out the tent. A lot of climbing in and out bent double and kneeling on uneven rocks was involved over the week. Some days were sunny and some grey and cold, nearly all were windy, with the wind battering the tent onto you as you worked.

tentStoer

So the process was:- firstly brush the bits off, then a layer of oil, which with hindsight was a bad idea; followed by a thin mix of silicon to pick up the details – because of the low temperatures and maybe insufficient mixing of the catalyst this seemed determined to follow gravity onto the groundsheet. However there was no choice but to continue, this time with a silicon layer with thickener. By then it was time to call it an end to Day 2. Although there were plans to return that night it was Day 3 that was spent putting on the third and final silicon layer with thickener. There was now a mighty fine silicon mould, but no way of knowing whether layer 1 had worked out.

siliconlayer

Day 4 was onto the plaster and jute mother mould. I had a long and supportive conversation with the super helpful guy from Special Plasters before starting out. The first layer again seemed determined to make a mould of the ground sheet, but then we discovered that it was going off in the plaster puddles and this mix was perfect for the jute layers. I was paranoid that I’d make a plaster mould that couldn’t be removed, or carried out over the beach cobbles, so I designed a 6 part mould. I made little clay walls for each section and we filled them with three layers of plaster soaked jute with support straps.

lintelplaster1poolWhen I removed the clay wall on each piece I oiled the surface and designed a wedge to ease the separation of the sections. After the third section there was a mishap with the scales and we swapped for a different set. This seemed to hugely improve the consistency of the plaster from there on; and the job speeded up because there was no need to wait for the pools on the groundsheet to go off. The number of sections meant that the work went on into Day 5.

siliconremoveHowever the plaster mould came off in sections as planned. Then the moment of truth, would the silicon mould have laminated, would the first layer have been successful? It was an anti climax, but a very welcome one, when it just lifted off and there it was, the first phase of a long process successfully completed. Perseverance paid off and I came away with a silicon mould that nestles in a plaster mother-mould.

Clachtoll Art Project – Bronze community sculpture

The other piece that I’ve been working on is a community sculpture.

Eighteen children from Lochinver primary have prepared designs and tried their hand at wax carving using local beeswax.

waxtreeschooli

Most of the children also did sand piece-moulds to cast metals beads which we then made up into nettle-stringed necklaces. Thank-you to the people who supported me with this workshop.

waxtreeschool

I then cleaned up the waxes so that they would cast well; and using the same method as the children (2 part sand moulds), I cast the first sixteen mini sculptures in bronze. I have been cleaning these – cutting of the running system, filing them back, sanding and polishing them.

waxschoollk

The Ullapool High school children who came to the broch helped run a copper smelt. The copper from that smelt was added to the bronze used for these mini sculptures. The high school pupils also cast pewter pieces using clay models that they had designed themselves.

The community sculpture has been growing with local people making mini sculptures.

groupmouldii
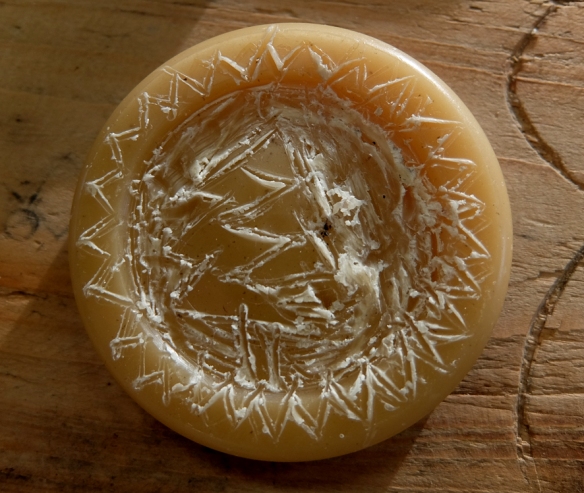
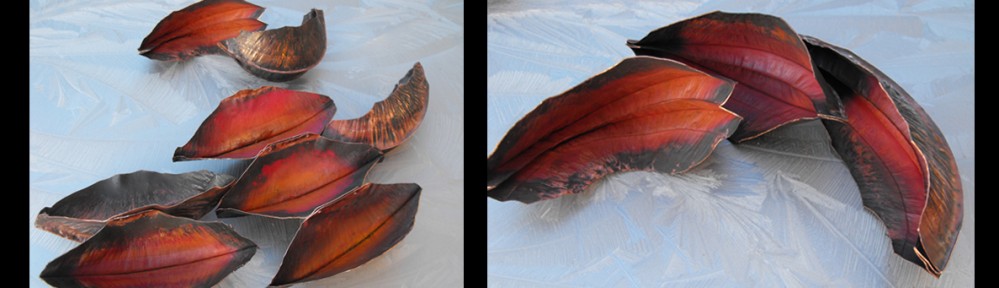
At a public event on Stoer field we smelted some more copper, which will be used in casting these waxes in bronze (thanks, Nigel, Fiona and Boyd)

Many of the dig volunteers and other people involved with the broch have added their designs, so I have a further 24 waxes cleaned and prepared for casting.

publicsmelt

The discussion on where they may be installed continues, but I hope they can be affixed to bedrock in a safe place near the broch.

The final public event at Glen Canisp on 16th November 2018 will be to cast the final waxes for the sculpture (including copper from the public smelt). We also have a special request to demonstrate the alloying of copper with tin to give bronze. I hope to have more details of the event planning soon.


Stone to Bowl grand finale

Last week was my final week of work at Scottish Sculpture Workshop on my VACMA funded Stone to Bowl copper project.

It focused on getting the bellows organised so that I can work anywhere in the landscape. Monday was spent fixing the blower which had arrived fractured. Eden Jolly did most of the work as it involved tig welding, but I did the cleaning of the joins and offered cups of tea. Eden and Fleur (an Erasmus student) made it a super wee base and I went to Portsoy to get it some flexible tubing. fanblowerSept18
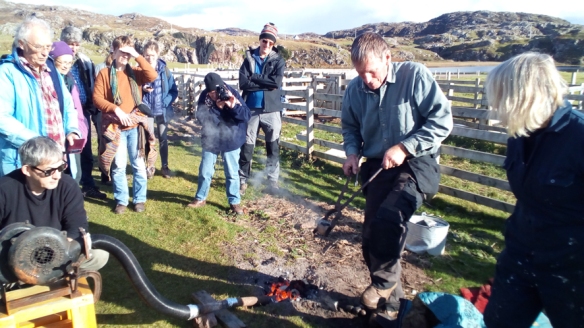
By Wednesday all was ready to return to copper smelting trials. The smelt balls tend to over heat in the shaft furnace as it’s hard to see what is going on.

smeltfurnaceSept18

So on Thursday I dug a pit furnace and trialed that smelting with great success.I got 35gm copper from 50gm ore in 30 minutes and using about 2kg of charcoal.

smeltballSept185i

On Friday it was time to trial the bowls mentioned in the project title. This was using ore I’d smelted alloyed with 10% silver. The photo shows the open mould after casting. The copper did not complete the pour. I need to redesign the bowls with a thicker base. Even after heating the moulds and with sling casting, the copper would not stay molten in such a thin walled vessel.

slingSept18i

Spending 4 weeks developing processes and tools has been brilliant and the work goes on.

Stone to Bowl

bloweri

Finally the hand cranked forge blower has arrived. This is hopefully the last piece of the Stone to Bowl project. The forge blower will deliver air to the furnace, powered by hand rather than electricity. I’ll find out next month at SSW if it can be made to work. If the bellows can be hand powered it means that I can work anywhere,

day7smeltblower

This is the model we hope to replicate.

Stone to Bowl clay dip moulds; incl wax melt out and all-in casting

Returning to Stone to Bowl:-

stonetobowlmouldfiringOnce the wax models have been made and sprued they are then dipped in a slurry mix of clay (this time from Kingsbarns) sand (Cellardyke beach) and fibre (horse poo from near Kilrenny). There are two mixes, one is fine and the early coats are done in this and the other is coarser to build up the outer layers. Each layer has to dry before the next layer is added so it takes several days to build up the mould.

stonetobowlday5iv

When the mould is built up a clay funnel is added. The moulds are then ready for the wax to be burnt out. The first photo shows the burn out. Below are the moulds that have been burnt out.

stonetobowlburnoutmoulds

The link below is to an animated film about lost wax casting, which explains the process well.

https://hyperallergic.com/286780/an-animated-guide-to-the-bronze-age-technique-of-lost-wax-casting/

I also tried out a casting method where you burn out the wax and then put the copper alloy in one end of the mould. You then seal up the mould with a lid and clay mixture and return the mould to the furnace. stonetobowlmoulds

This photo shows the moulds and lids ready for burn out.

stonetobowlallinmoulds

This photo shows the all in one moulds ready to return to the furnace for the copper melting stage.

In theory the copper heats to melting point and you upend the mould and the copper pours into the part that you want to cast, In practice because you can’t see the metal it is difficult not to either get incomplete melting or over heating and the metal seeping out through the ceramic shell.

stone2inmouldcasting

The photo shows incomplete melting, the copper is fused (bottom right)

stone2allincast

This photo shows a mould where the metal over heated and seeped through the mould walls. There are two moulds, one complete (but rattles so I’ve not broken it) and an open one.

The moulds with incomplete melting can be ‘re-used’ as open moulds.