

The day dawned bright and by lunchtime the mould was finally finished; Eden had mended the furnace and the ‘bull ladle’ was also fixed; the fork lift was in place to take the weight of the ladle; Michael had cracked the scrap iron (thanks Michael) and weighed the bags of coke and iron. Eden must have laid the bed of coke in the furnace when I was working on the mould indoors; the air blowers and gas tanks were in place. It was decided by the tech team to go ahead with the pour.
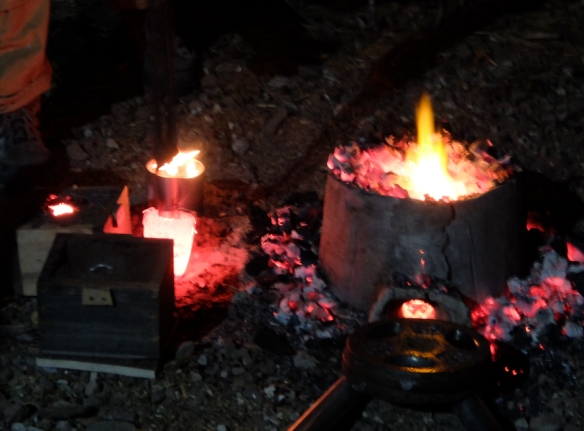
The furnace was lit and the air blower turned on to force the temperature up to melting point; the gas blower was turned on to the ‘bull ladle’ to heat it up ready to receive the molten iron when the furnace was tapped.
The photo above shows Michael adding a charge of coke and scrap iron to the top of the furnace. As the iron scrap heats it becomes molten and drops to the bottom of the furnace. When enough iron for the pour (over 65kg) is molten at the bottom of the furnace the bung is broken so the iron can run into the ‘ladle/crucible’.

The weight of the iron is taken by the fork lift and Michael and George manoeuvred the bull ladle into position and tipped it to pour the molten iron into the mould. There was a delay when the fork lift wouldn’t start and an alternative lifting device was tried before reverting to the fork lift.

Towards the end of the pour the bull ladle got caught in some way and the pour was aborted. The mould was showing metal through the air vents, so the general view was that the pour could be complete. The team have reviewed the equipment and made safety alterations since.
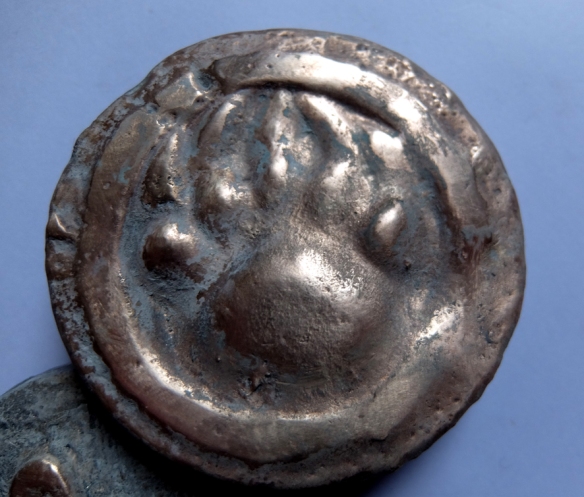
The metal needed to cool before I could peek inside, so I left it for the weekend. On Monday I removed the mould pieces to reveal an iron lintel, yeah
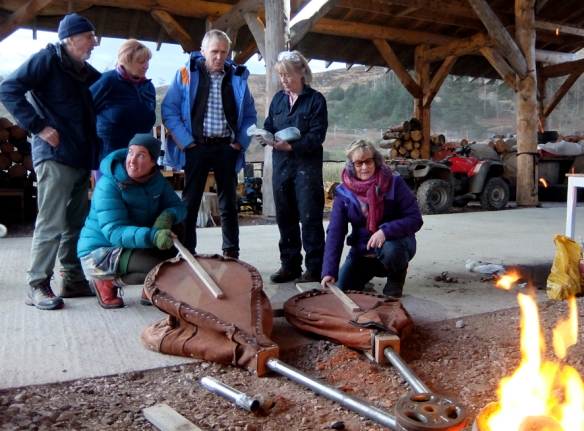
 Thanks to Scottish Sculpture Workshop tech team and George Beasley.

 We got a tent erected near to the broch, in the lee of the stones from the rockfall in the broch that the restoration project removed in season one. It was surprisingly easy to heave the stone lintel into the tent on Day 1 and surprisingly uncomfortable working in and out the tent. A lot of climbing in and out bent double and kneeling on uneven rocks was involved over the week. Some days were sunny and some grey and cold, nearly all were windy, with the wind battering the tent onto you as you worked.

 When I removed the clay wall on each piece I oiled the surface and designed a wedge to ease the separation of the sections. After the third section there was a mishap with the scales and we swapped for a different set. This seemed to hugely improve the consistency of the plaster from there on; and the job speeded up because there was no need to wait for the pools on the groundsheet to go off. The number of sections meant that the work went on into Day 5.
 However the plaster mould came off in sections as planned. Then the moment of truth, would the silicon mould have laminated, would the first layer have been successful? It was an anti climax, but a very welcome one, when it just lifted off and there it was, the first phase of a long process successfully completed. Perseverance paid off and I came away with a silicon mould that nestles in a plaster mother-mould.
 I’m hoping that they will weather and patinate over the years, I started the patination process with sea water and beeswax resist. They are mainly on the Stoer approach, but there are a few on the Clachtoll side. So if you are on the site do try and find all forty four of them.
 Can you find the bone comb? Maybe a plan of the broch? A panda or a Pod?
 We had some local charcoal courtesy of Chris (although most of it came from the Chinese wholesalers in Dundee). Heather Fulton took loads of photos, some of which I’m using here.
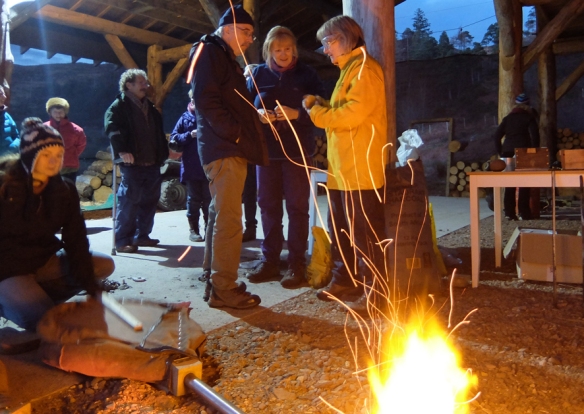


 A view into the inferno
 This is George Beasley lighting the furnace for his demonstration run.
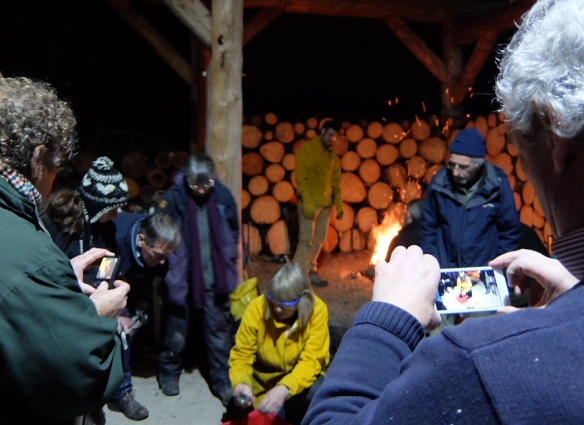
 This is the team discussing roles, the furnace is running on blown air to maintain and build up heat having been lit with the gas torch.
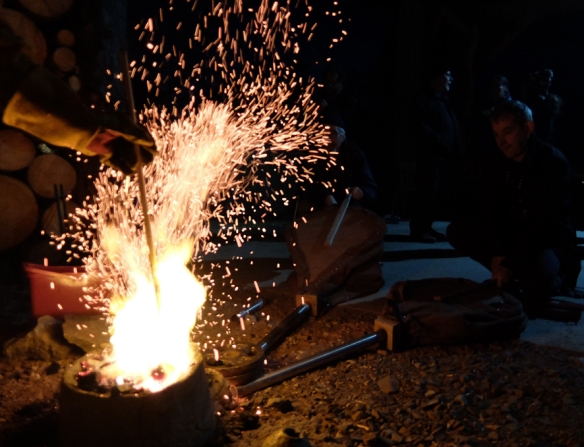
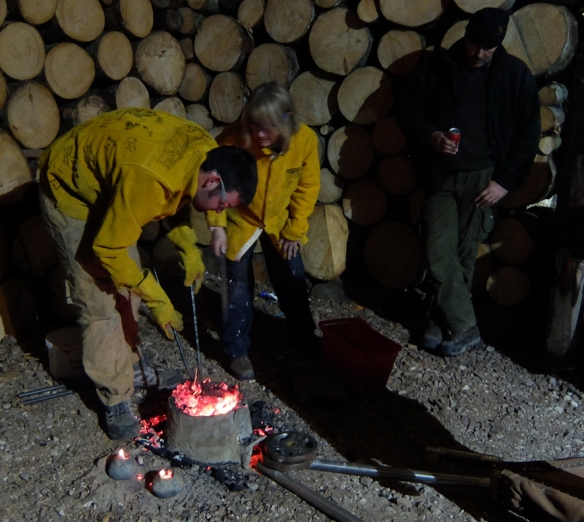
 Adding coke to the furnace onto a charge of scrap iron. The iron scrap melts and drops down to the bottom of the furnace. It is then tapped from the bottom into a crucible for pouring.
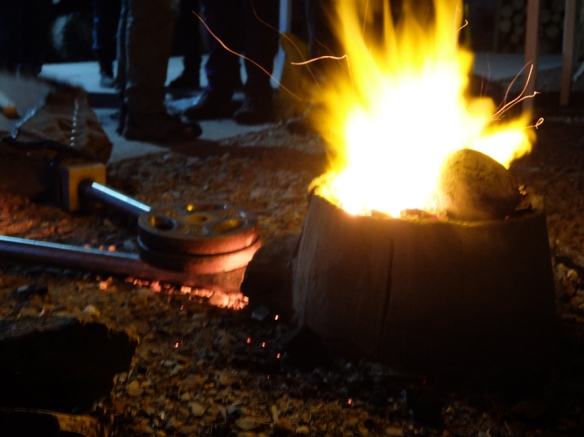
 Heating the crucible ready for it to receive molten iron for pouring into moulds.
 Yvonne taking notes for the log so we know how the furnace is running.
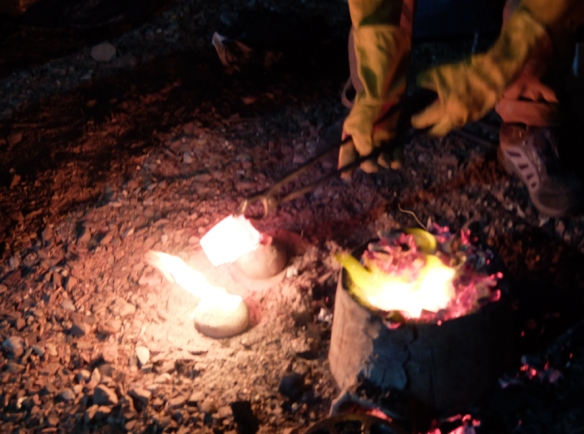
 Molten iron tapped from the furnace flowing into the crucible for pouring
 Andrew and Uist pouring iron
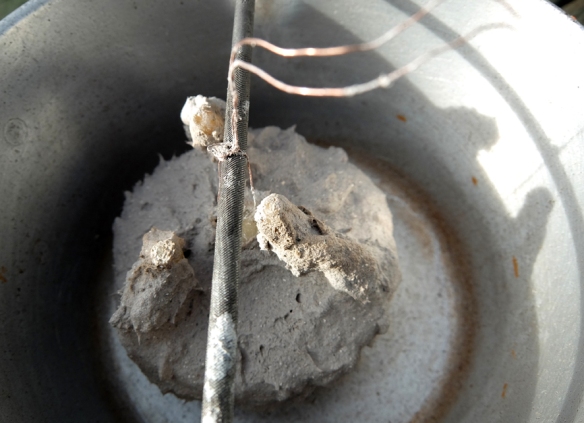
 My sand moulds with clay along the joins to minimize the amount of burning to the boxes.
 Eden and I checking how the beach-sand moulds held up
 Dropping the bottom when the last tap has been used. This coke can be cleaned and reused.